
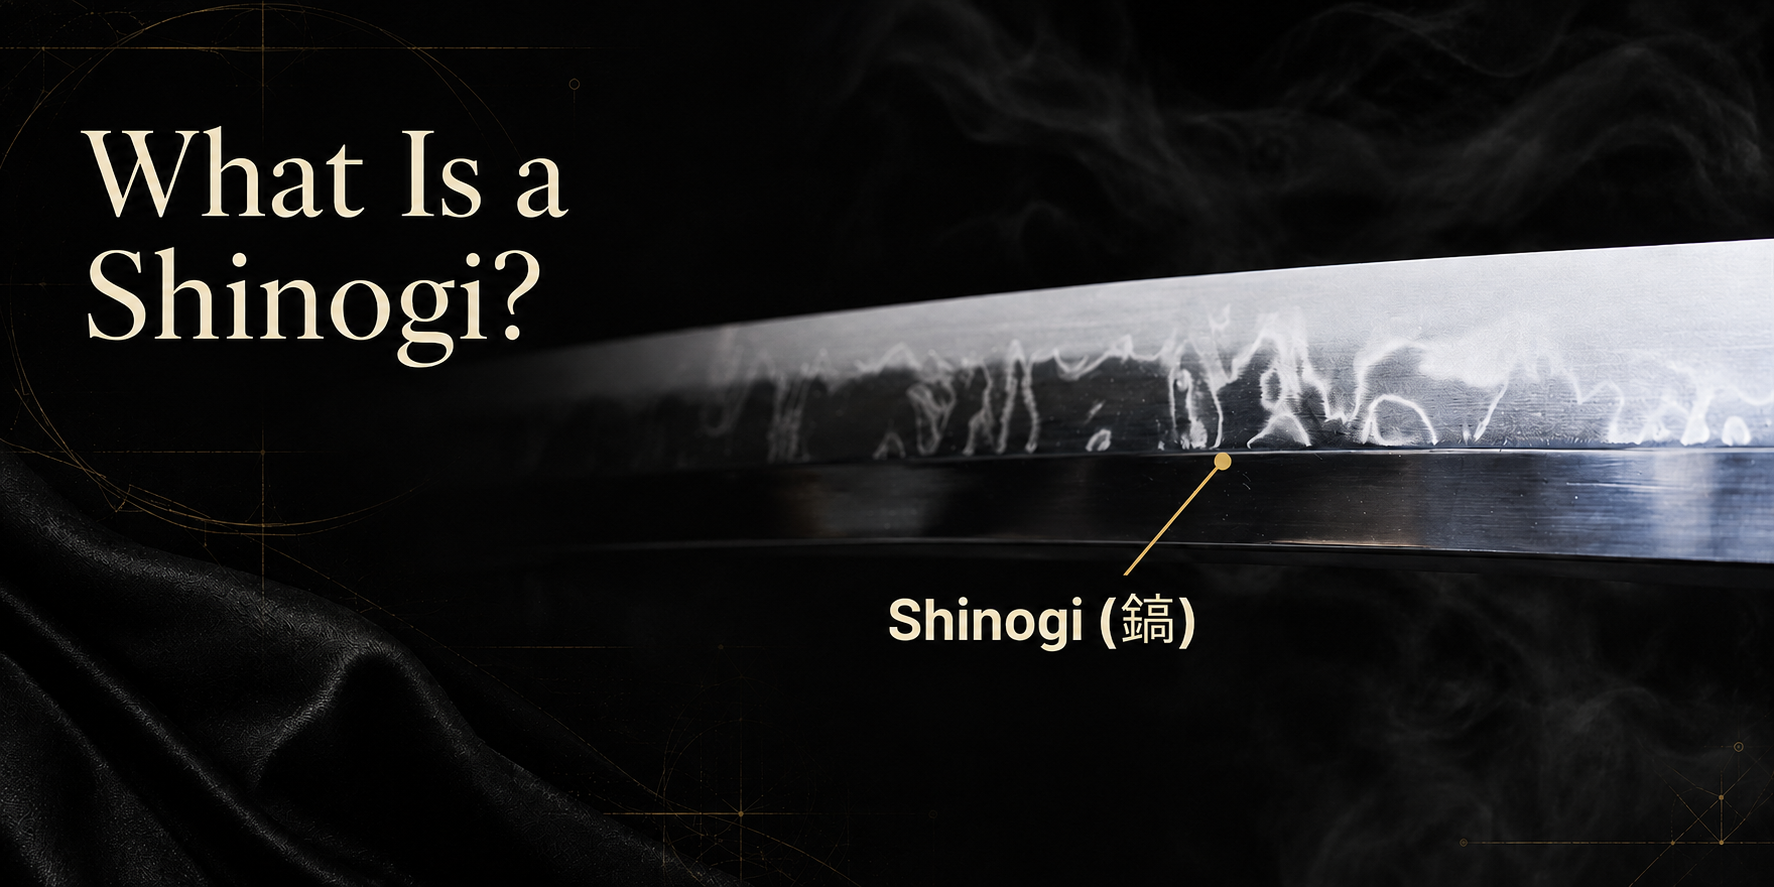
What Is a Shinogi?
When most beginners first look at a Japanese sword, their eyes go straight to the cutting edge. They may also notice the pale, sometimes wavy pattern running alongside it. Yet another important feature sits a little higher up the blade—and it is surprisingly easy to miss.
That feature is the shinogi.
Put simply, the shinogi is the raised ridge running lengthwise along the side of many Japanese sword blades. It marks the point where two surfaces meet at different angles, making it an important part of the blade’s cross-sectional geometry.
Once you know what to look for, the shinogi becomes much easier to spot. It can also help explain why one katana looks crisp and carefully defined while another appears flatter, rounder or visually heavier.
For anyone considering their first Japanese sword in Australia, learning this one term is genuinely useful. It helps you understand descriptions such as shinogi-zukuri, shinogi-ji and “high shinogi”. More importantly, it gives you a better idea of what to look for in seller photographs before ordering a sword from Sydney, Melbourne, Brisbane, Perth or overseas.
This guide starts with the basics. You will not need any previous knowledge—or need to handle a blade—to follow along.
Where Is the Shinogi?
To locate the shinogi, picture the side of a typical katana.
At the bottom is the ha, or cutting edge. At the top is the mune, meaning the back or spine. Between them are several surfaces that shape the blade and gradually lead towards the edge.
The shinogi is the raised ridge between the cutting edge and the spine. On a conventional shinogi-zukuri blade, it usually sits closer to the spine.
Several related Japanese terms describe this area:
-
Shinogi: the raised ridge or ridged area.
-
Shinogi-suji: the line running along the crest of the ridge.
-
Shinogi-ji: the surface between the shinogi-suji and the spine.
-
Ji or hira-ji: the main side surface below the shinogi.
-
Mune: the back or spine of the blade.
-
Ha: the cutting edge.
Here is an easy way to picture it. Take a long piece of card and fold it so that two flat surfaces meet along a crease. Light will strike those surfaces differently, making the crease visible even though no line has been drawn.
The shinogi works in a similar way. Its visible line is created by a genuine change in angle, not by paint, etching or decoration.
Under broad, soft lighting, one side of the ridge may catch the light while the neighbouring surface appears darker. As the viewing angle changes, the reflection moves across the blade, but the geometric boundary remains.
What the Shinogi Is Not
Beginners often assume that every visible line on a katana is the same feature. In reality, the shinogi, hamon, groove and yokote are entirely different parts of the blade.
Understanding these differences is one of the quickest ways to make sense of Japanese sword terminology.
Shinogi vs Hamon
The shinogi is part of the blade’s physical shape. The hamon is the visible pattern associated with the hardened edge area created during heat treatment.
The hamon normally appears close to the cutting edge. It may be straight, gently wavy or more irregular, depending on the blade. The shinogi generally runs higher up the side and marks the boundary between two differently angled surfaces.
In short, the hamon is associated with heat treatment, while the shinogi is a matter of geometry.
Shinogi vs Groove
A groove such as a bo-hi is a recessed channel in the blade. The shinogi, by contrast, is a raised ridge.
A bo-hi may run through the shinogi-ji on some blades, but that does not make it part of the shinogi. A channel removes or lowers part of the surface; a ridge marks where two surfaces rise and meet.
This distinction matters when reading product descriptions. A dramatic groove may dominate a seller’s photographs, but it tells you very little about whether the surrounding blade geometry is accurate or well preserved.
Shinogi vs Yokote
The yokote is the transverse boundary separating the main body of many Japanese blades from the point, or kissaki. The shinogi runs lengthwise, while the yokote crosses the blade near the tip.
On a typical shinogi-zukuri blade, the two features meet as part of the point geometry. However, some blade forms have a shinogi without a distinct yokote.
A handy rule of thumb is:
The hamon relates to heat treatment, the hi is a groove, the yokote marks the point, and the shinogi is the lengthwise ridge.
Why Does the Shinogi Matter?
A sword blade has to balance several competing requirements within a limited amount of steel.
The edge needs suitable geometry to cut effectively. The blade also needs enough material to support its overall structure without carrying unnecessary mass.
Making the entire blade equally thick would add weight. Making every part equally thin would leave less material through the central and spine-side areas. A shaped cross-section allows the maker to distribute steel differently across the blade.
In a simplified view of shinogi-zukuri geometry, the surfaces below the shinogi move towards the cutting edge, while more material remains around the ridge and spine-side portion. The resulting cross-section is sometimes described as elongated or diamond-like, although the precise shape varies from blade to blade.
However, the shinogi alone does not make a sword light, strong or effective.
A blade’s behaviour depends on the complete design, including:
-
Its overall width and thickness.
-
How its thickness changes from the base to the point.
-
Its edge geometry and surface curvature.
-
The curvature of the blade as a whole.
-
The steel and heat treatment.
-
The quality of workmanship.
-
Its condition and any later alterations.
The most accurate way to describe the shinogi is to say that it helps manage the distribution of material across the blade. It forms part of the balance between edge geometry, mass and rigidity, but it cannot be evaluated in isolation.
This distinction is important when shopping online. A prominent ridge does not prove that a sword is durable, traditionally made or suitable for cutting. It simply reveals something about the intended shape of the blade.
Do All Japanese Sword Blades Have a Shinogi?
No. A blade without a shinogi is not necessarily incomplete, damaged or poorly made.
Three basic blade forms are especially helpful for understanding why some Japanese sword blades have a shinogi while others do not.
Hira-zukuri
A hira-zukuri blade has no shinogi. Its sides have a comparatively simple arrangement of surfaces without the prominent lengthwise ridge seen on many katana.
This construction is commonly associated with tanto and other shorter blades, although each sword should be identified from its own features. If a blade was intentionally made in hira-zukuri, the absence of a shinogi is perfectly normal.
Nothing is missing. That is simply how the blade was designed.
Kiriha-zukuri
A kiriha-zukuri blade has a bevel positioned closer to the cutting edge, leaving a larger flat area above it. Its ridge therefore sits much lower than the shinogi on a typical shinogi-zukuri blade.
For beginners, the key point is visual rather than historical: moving the ridge changes the proportions of the surfaces on the side of the blade.
Shinogi-zukuri
A shinogi-zukuri blade has the familiar raised ridge between the cutting edge and the spine, generally positioned closer to the spine. This is the construction widely recognised on katana and wakizashi.
These categories are best understood as different structural forms. They should not be arranged on a simple scale from basic to advanced or from inferior to superior. Different constructions were used for different blade designs, and one form is not automatically better than another.
Variations in Shinogi-Based Geometry
Once you understand the standard shinogi, several less common blade forms become easier to recognise.
A beginner does not need to memorise an entire catalogue of Japanese terms. However, two examples are particularly useful because they challenge common assumptions about how a blade should look.
Shobu-zukuri
A shobu-zukuri blade has a shinogi but no distinct yokote. Instead, the ridge continues towards the point as the blade narrows.
This is a useful reminder that the presence of a shinogi does not guarantee that every other familiar katana feature will also be present.
Katakiriha-zukuri
A katakiriha-zukuri blade uses different geometry on its two sides. One side follows kiriha-zukuri construction, while the other may use hira-zukuri or shinogi-zukuri construction.
As a result, the two sides may look intentionally different. A beginner expecting perfect visual symmetry could easily mistake this design for poor grinding or damage.
Other specialised forms alter the relationship between the ridge, spine and point in different ways. These include kanmuri-otoshi-zukuri, unokubi-zukuri and osoraku-zukuri.
You do not need to learn all these names straight away. Their main lesson is much simpler: Japanese sword blades do not all share one standard cross-section.
Before deciding that a ridge is missing or incorrectly positioned, first identify the construction the blade is meant to have.
What Do “High Shinogi” and “Low Shinogi” Mean?
Not every shinogi projects to the same degree.
When the ridge rises prominently from the blade’s cross-section, it may be described as a high shinogi. A less prominent ridge may be described as a low shinogi.
These descriptions refer to relative geometry, not an automatic grade of quality. A higher ridge is not necessarily better, stronger or more valuable. It may simply suit the intended proportions of a particular blade.
There is no single visual rule that allows a beginner to classify every shinogi as high or low. The result depends on the blade form, the point of comparison and the overall relationship between the ridge, spine and surrounding surfaces.
Photographs add another layer of uncertainty. Lens angle, reflections and image compression can all make a ridge look higher, lower, straighter or softer than it really is.
That means an unsupported description such as “extra-high shinogi” is not particularly useful on its own. For an online buyer, clear photographs, sensible measurements and an explanation of the blade’s intended construction matter far more than an impressive-sounding label.
How to Recognise the Shinogi in Photographs
A flat, front-facing product photograph may show the outline and hamon clearly while hiding most of the cross-section.
To see the shinogi properly, you need photographs that reveal how light moves across the blade’s surfaces.
Consider asking the seller for:
-
Full-length photographs of both sides of the actual blade.
-
Oblique photographs with a broad reflection running along the blade.
-
A view from the spine showing the cross-sectional shape.
-
Close-ups of the ridge near the base, middle and point.
-
Clear photographs of the yokote and kissaki, where applicable.
-
Confirmation of the intended blade construction.
-
Details of any previous polishing, reshaping or repairs.
Begin by locating the spine. Then move your eyes down the side of the blade until the reflected light changes at a long ridge. Follow that ridge from the base towards the point.
On a conventional shinogi-zukuri blade, the shinogi should form part of an organised transition into the point. On shobu-zukuri, it continues towards the tip without a separate yokote. On hira-zukuri, there should be no shinogi to find.
A line that looks perfectly straight in one photograph may appear different under another lighting angle. Do not make a judgement from a single image. If the geometry remains unclear, ask for another view.
Can a Crisp Shinogi Prove Quality or Authenticity?
No single feature can authenticate a Japanese sword.
A crisp shinogi may indicate clearly defined surfaces, but it does not establish when, where or how the blade was made. Nor does it reveal the complete quality of the steel or heat treatment.
Likewise, a softer-looking ridge does not automatically mean that a sword is fake. The intended construction, lighting, condition and polishing history can all affect what appears in a photograph.
A proper assessment considers the whole object, including:
-
Overall blade shape and proportions.
-
Cross-sectional geometry.
-
Surface condition.
-
Hamon and steel surface, where visible.
-
Point and tang.
-
Signs of repair or alteration.
-
Documentation and provenance.
-
Expert examination, where appropriate.
Marketing phrases such as “samurai-grade”, “traditional shape” or “battle-ready shinogi” are not recognised measurements or guarantees.
Instead of asking whether the shinogi looks impressive, ask whether it suits the stated blade form and remains consistent with the rest of the sword.
Protecting the Shinogi
Caring for the shinogi means preserving its original shape.
Never use sandpaper, a powered polishing wheel or general-purpose metal polish to make the ridge look sharper. Abrasive work removes steel. It can round the shinogi-suji, flatten nearby surfaces and permanently change the blade’s geometry.
Avoid touching polished steel with bare fingers as well. Fingerprints leave moisture and salts behind, which may contribute to staining or corrosion.
The correct maintenance routine will depend on whether the sword is an antique, a traditionally polished blade, a modern reproduction or an unsharpened training sword. One care method will not necessarily suit every blade.
If you have never handled a sword, start with photographs and diagrams. Do not unsheathe a sharp blade simply to locate the shinogi. Ask an experienced collector, conservator or suitably qualified instructor for guidance.
A Note for Australian Buyers
Sword laws vary between Australian states and territories, while Commonwealth import controls are a separate matter. The fact that a seller can ship a sword does not automatically mean it can lawfully be imported, possessed, transported or displayed in your location.
Before ordering, check the latest official information published by your state or territory police and the Australian Border Force. Do not rely solely on a seller’s general statement that an item is “legal in Australia”.
This is general information, not legal advice.
Final Thoughts
The shinogi is the raised ridge that helps define the cross-sectional geometry of many Japanese sword blades. The line along its crest is the shinogi-suji, while the surface between the ridge and spine is the shinogi-ji.
Those definitions are straightforward, but they lead to several useful conclusions.
The shinogi is not the hamon, a groove or the cutting edge. Not every Japanese blade is supposed to have one. Its height is not an independent measure of quality, and its appearance alone cannot prove a sword’s age or authenticity.
What the shinogi does provide is a practical way to read the blade as a three-dimensional object. It shows how the edge-side surface relates to the thicker ridge and spine-side area. It can also help you distinguish one blade construction from another.
Whether you are comparing katana photographs from a seller in Melbourne, researching a first purchase from Sydney, or studying blade terminology in Brisbane, Perth or Adelaide, the basic approach remains the same: identify the intended construction, examine the full geometry and ask for evidence whenever a description makes a strong claim.
Once you understand the shinogi, a Japanese sword no longer looks like a flat piece of polished steel. It becomes a carefully arranged set of surfaces, angles and proportions.
That shift—from simply seeing the blade to understanding its shape—is one of the most useful first steps a new collector can take.