
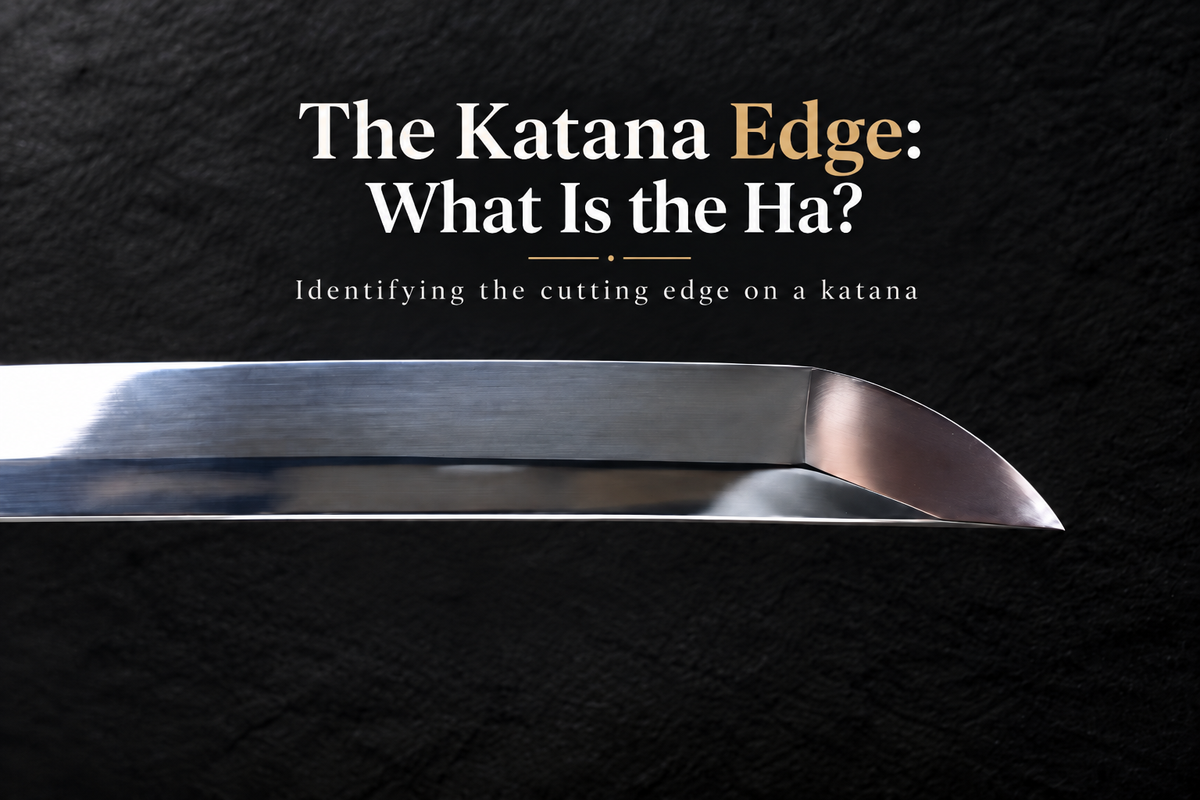
The Katana Edge: What Is the Ha?
The ha is the cutting edge of a Japanese sword. On a typical katana, it follows the blade’s outer curve, opposite the spine.
That sounds straightforward—until you open a product photograph and notice several different lines. There may be a pale wave near the edge, a crisp ridge farther up the blade and another boundary near the point. Which one is the actual cutting edge?
Learning to tell them apart is a useful first step towards understanding Japanese swords. It also makes product descriptions easier to assess, especially when they rely on phrases such as “razor sharp” or “premium steel”.
If you are researching your first katana from Sydney or comparing an interstate seller’s photographs from Perth, start with what you can identify. This guide walks you through the edge, the steel around it and the details worth checking before you buy.
You do not need to handle a sword to follow along. A clear photograph is enough to begin.
1. Finding the Ha on a Blade
Imagine looking at a katana from the side. First, locate the two long boundaries of the blade.
One is the mune, or spine. The other is the ha, the cutting edge. On a typical curved katana, the ha follows the outside of the curve and continues towards the tip.
The distinction between the blade and its edge is useful here. The blade is the larger steel structure; the ha is its cutting boundary.
A few neighbouring features will help you get your bearings:
-
Mune: the back or spine.
-
Shinogi: the raised lengthwise ridge found on many blade forms.
-
Kissaki: the point section.
-
Ha-machi: the small notch at the beginning of the cutting edge, near the blade collar.
The blade collar, called the habaki, can partly conceal the area around the ha-machi when the sword is assembled.
At the other end, the ha follows the curved cutting outline of the point. That curve is called the fukura. You do not need to memorise every term straight away, but knowing that the edge continues into the point will help you make sense of close-up photographs.
Remember, too, that sellers photograph swords in different orientations. The lower boundary in a picture is not necessarily the cutting edge.
2. Ha, Yakiba and Hamon: Making Sense of the Lines
Now return to the pale or wavy pattern near the edge. This is where three terms come in handy.
Ha means the actual cutting edge.
Yakiba means the hardened edge region of a differentially hardened blade.
Hamon means the visible pattern associated with that differential hardening.
Think of them as an edge, a region and a pattern. The ha forms the cutting boundary. The yakiba extends inward from it through an area of steel. The hamon is the visible hardening pattern along that region.
This explains why a katana can have a wavy hamon and a smooth cutting outline. The waves belong to the hardening pattern; they are not teeth along the edge.
The distinction also matters when looking at the bright white band visible in some photographs. Polishing can emphasise the hardened region, while lighting affects how clearly its details appear. The most obvious white outline should not be treated as an exact map of hardness.
Two other features are worth separating from the ha. The shinogi is a ridge higher on the blade’s side. A groove, such as a bo-hi, is a recessed channel. Neither is the cutting edge.
Once you can recognise these features, a product photograph becomes much easier to read. You can focus on the edge itself without being distracted by the most eye-catching detail.
3. Why the Steel Behind the Edge Matters
Recognising the ha is only the beginning. Its shape makes more sense when you consider the steel immediately behind it.
The narrowest part of an edge is often called the apex. Moving inward from the apex, the blade becomes thicker. The shape of those supporting surfaces is part of the edge’s geometry.
A kitchen knife and a heavier cleaver offer a familiar comparison. Both can be sharp, but the amount and shape of the steel behind their edges differ. This comparison helps explain edge support; it does not mean swords should share their sharpening angles or uses.
In Japanese sword terminology, niku, literally “meat”, describes fullness or convexity in the blade’s side surfaces.
Niku is different from overall thickness. A relatively thick blade can have flat sides, while a thinner blade can still have convex surfaces. What matters is how those surfaces develop from the edge into the body.
That is why “the thinnest edge is the best edge” is an unreliable rule. Edge geometry involves trade-offs between a fine cutting profile and the material supporting it. The appropriate shape depends on the complete blade.
The sword’s curvature, or sori, is another part of that overall geometry. It affects how the edge meets material during movement, but it does not determine sharpness at the apex. A curved blade can be blunt, just as a straight blade can be sharp.
For a beginner, it helps to look beyond “How sharp is it?” and consider how the edge, its supporting surfaces and the rest of the blade work together.
4. How Materials and Craftsmanship Shape the Ha
The finished edge depends on several stages of work. Each plays a different role, and none provides a complete measure of quality on its own.
Preparing the steel
Traditionally made Japanese swords commonly use tamahagane, steel produced through the tatara smelting process.
The smith selects and works the material before shaping it into a blade. Folding and forge-welding help prepare this steel by managing its composition and reducing some unwanted inclusions.
A fold count, however, tells you little by itself. The result depends on the starting material and how the work is carried out. More folds do not automatically produce a sharper or better edge.
Modern Japanese-style swords may use other steels, so their material preparation should not be judged solely by whether it follows this traditional process.
Arranging the materials
Some traditional blade constructions combine steels with different properties. One familiar arrangement places harder outer steel around a softer core.
This is one way to balance material properties, rather than a guarantee of superior performance. Other arrangements exist, and a seller should be able to explain the construction of the particular sword being offered.
Developing properties through heat treatment
Heat treatment changes the steel’s properties. In traditional differential hardening, a clay-based coating helps influence cooling during quenching, allowing the edge region and the blade’s body to develop different structures.
The result can be a harder edge and a comparatively softer body.
Hardness and toughness describe different properties. Hardness concerns resistance to indentation and deformation; toughness concerns resistance to fracture. A hard edge can still chip.
A hardness figure therefore needs context: the steel, the treatment and the location of the measurement all matter. One number cannot describe the whole sword.
Refining the blade through polishing
Polishing establishes and refines the blade’s surfaces while revealing details in the steel and hardened region.
The work must preserve the relationship between the edge, the side surfaces, the ridges and the point. Removing material from one area can affect the proportions around it.
This is why a pull-through sharpener or an improvised grinding treatment may be unsuitable. It can create a bevel that does not belong to the blade’s intended geometry.
Polishing also removes steel permanently. Any restoration decision must consider how much material remains and which features can be preserved. An antique blade and a modern production sword may call for different approaches.
5. What the Hamon Can Help You Understand
With the edge and its construction in mind, return to the pattern above it.
Two broad categories provide a useful starting point.
Suguha describes a hamon that follows a generally straight course. It can be narrow or broad, and even simple-looking examples may contain subtle details that ordinary photographs miss.
Midare describes irregular patterns. Within this broad group, you may encounter:
-
Gunome: a sequence of rounded forms.
-
Notare: an undulating, wave-like pattern.
-
Choji: forms traditionally compared to clove buds.
These features can appear in combination. Their names describe appearance, not degrees of sharpness.
A straight hamon is not automatically less accomplished than an elaborate one. Equally, a bold pattern does not establish that the edge is in good condition.
Specialists consider the hamon alongside the blade’s shape, steel surface, point, tang and other evidence. It can contribute to an assessment, but it cannot independently identify a maker or establish authenticity.
For someone choosing a first sword, these names are most useful as descriptive tools. They help you understand what a seller is showing you and ask more precise questions.
6. What Product Photographs Can Tell You
A photograph can reveal the blade’s outline, visible surface condition and some details of workmanship. It cannot certify sharpness, internal soundness or suitability for use.
Start by confirming that the photographs show the actual sword for sale. Representative images are less useful when you need to assess an individual blade’s condition.
Ask to see both sides, the full cutting outline and the point. Request close-ups of any disclosed damage. Photographs taken under different lighting conditions may also help distinguish reflections from marks on the steel.
Several conditions deserve attention.
Chips are missing pieces along the edge. Their significance depends on their depth, position and the surrounding blade. A small-looking chip is not necessarily a straightforward repair.
Hagire are cracks extending inward from the cutting edge, often approximately perpendicular to it. They are serious defects and can be difficult to see. A suspected crack needs professional assessment.
Rust and pitting can affect both the surface and the edge. Photographs may show discolouration without revealing how deep the damage goes.
Changes to the outline may indicate reshaping or previous repairs, although an unfamiliar shape should first be checked against the blade’s intended form.
If you are comparing Japanese swords online from Brisbane, Melbourne or Adelaide, ask the seller:
-
Is the blade sharp or unsharpened?
-
What steel, construction and heat treatment are specified?
-
Are there any known chips, cracks or areas of rust?
-
Has the edge been repaired, sharpened or reshaped?
-
What documentation supports the description?
-
What is the sword’s stated intended use?
Take cutting videos at face value: they show a demonstration under particular conditions. They do not establish the condition of the sword that will arrive at your door.
If you plan to train in a martial art, check your instructor’s equipment requirements before purchasing. The appropriate choice depends on the discipline and your stage of training.
7. Caring for the Edge
You do not need to touch the ha to identify it. Never run a finger along the cutting edge to check its sharpness.
Begin with photographs, diagrams and suitable handling guidance. There is no need to copy an online cutting demonstration to learn the terminology.
Preservation focuses on preventing rust, scratches and unnecessary material removal. Keep maintenance materials clean and follow guidance suited to the particular blade.
Avoid abrasive household cleaners and improvised rust removal. Where protective oil is appropriate, excessive amounts can collect inside the scabbard and cause problems.
Base your storage decisions on the conditions in the room, including moisture and temperature changes. Your city alone does not determine an appropriate maintenance routine.
If rust appears or the edge is damaged, seek specialist advice before attempting a repair. Removing a visible mark yourself may alter the blade and make later restoration more difficult.
From Looking to Understanding
The ha is a narrow part of the sword, but it connects the blade’s materials, heat treatment, geometry and condition.
Learning to recognise it gives you a clearer starting point. You can distinguish the cutting edge from the hardened region and the hamon, then examine how the surrounding surfaces support it.
Before comparing prices, take another look at the product photographs. Can you identify the edge, distinguish it from the hamon and see the point clearly? Does the seller explain the blade’s condition and any previous work?
If those details are missing, request clearer photographs and a written condition description.
For a first-time buyer, these are useful habits to develop. They turn an impression of “sharp and shiny” into a more informed understanding of the complete sword—and give you a stronger foundation for whatever you choose to learn next.